Using Eclipse to remote debug Python Scripts on a Raspberry Pi
Overview
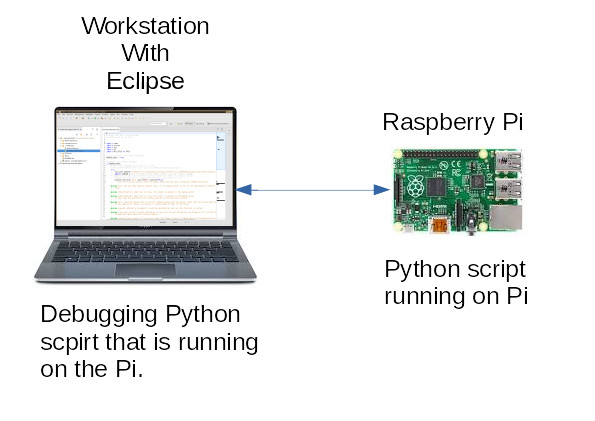
Using Eclipse on a workstation to debug Python scripts on a Raspberry Pi is a very powerful debugging tool. To do this, you will need to install Eclipse IDE and Eclipse Pydev plugin on the workstation. On the Raspberry Pi you will to install install the Pydev python module and the example python script below.
Network Connection
Both devices need to communicate over an IP connection this can be a local network LAN or even over the Internet. In this post, I’m assuming the Pi and the workstation are on the same network. Over the Internet, you would need to make sure any firewalls between the two devices will allow port 5678. You would also need to set up port forwarding on the firewall to forward incoming requests to the workstation. The Pi makes a connection to the workstation when the Python script Pydev function pydevd.settrace() is called, more on that later on.
Check the Java JRE Release number
Current releases of Eclipse require Java 11 JRE/JDK or newer to run, so the first thing you need to do is check and see if you have Java Run time Environment JDK/JRE installed and the correct release.
$ java -version
openjdk version "11.0.11" 2021-04-20
OpenJDK Runtime Environment (build 11.0.11+9-Ubuntu-0ubuntu2.20.04)
OpenJDK 64-Bit Server VM (build 11.0.11+9-Ubuntu-0ubuntu2.20.04, mixed mode, sharing)
Installing Eclipse IDE on the Workstation
How that you have verified you have Java 11 JRE or higher. Go to Installer Download select your system type and download.
Copy the tar file to the directory where you want it installed and change to that directory. In this example I’m using the home directory.
$ cd ~/Dowonloads
$ mv eclipse-inst-linux64.tar.gz ~/.
Next unpack it (this is a Linux system, file name will be different for other OS’s).
$ cd
$ tar xvfz eclipse-inst-linux64.tar.gz
Change into the “eclipse-installer” sub directory and run the installer.
$ cd eclipse-installer $ ./eclipse-inst
After it installs chose launch and eclipse should load.
To run eclipse later run eclipse from the command line, some distributions automatically add it the the menu has well.
If you installed it in $HOME directory, if not change to the directory where you installed it.
$ cd $HOME/eclipse/ $ ./eclipse
Installing the Eclispe Pydev plugin
You need the Pydev plugin to debug and create Python code in Eclipse. There are several ways to install the plugin, but the easiest and fastest is to go to the marketplace.eclipse.com site and use the drag and drop feature. To do that you need to have eclipse up and go to http://marketplace.eclipse.org/. The second option to install a plugin is from within Eclipse Help -> Eclipse Marketplace. Once at the Eclipse Marketplace search for Pydev.
Install by selecting the Install  button.
Configuring the Raspberry Pi to allow remote debugging
PyDev has a module in the Python Package repository pydev install it using PIP.
$ sudo apt update
$ sudo apt install python3-pip
$ pyhton3 pip install pydev
If you followed the above step you should be able to remotely debug Python scripts on a Pi from a workstation using Eclipse IDE with the Pydev plugin.
Note
You may get a warning on the Pi when you run the script below.
warning: Debugger speedups using cython not found.
Run '"/usr/bin/python" "/home/billf/eclipse-PyDev/pysrc/setup_cython.py" build_ext --' to build.
To eliminate the warning message, install cython3 and build the ext’s . Doesn’t seem to affect the debugging, so you can skip the next few steps, but it is easy to fix.
To eliminate the warning message, you need cython3 installed to compile.
$ sudo apt-get install cython3
To eliminate the warning message, next, build the ext’s
/usr/bin/python3 /tmp/pydev/plugins/org.python.pydev.core_8.3.0.202104101217/pysrc/setup_cython.py build_ext --inplace
Testing Eclipse remote debug Python on a Raspberry Pi
Below is a simple test script that will show output in the eclipse console, install it on the Pi.
"""This Python script starts the Pydev debugger in eclipse and displays output
on the eclipse console"""

import sys
import os
import datetime

import pydevd


HOST = "192.168.0.120"
"""Can be an IP address or hostname"""


def remote_debug_setup():
    """Function for Pydev Python debug"""
    try:

        # If you want to break as soon as the pydevd.sttrace
        # function below is called set "suspend=True and the debug will start
        # on the next line of python code after pydevd.settrace().
        # if you want set a break point some else in your code change "suspend=False" and
        # insert "pydevd.settrace()" function where you want the break point.
        # pydevd.settrace('Remote IP address or hostname',port=5678, suspend=True)
        # stdoutToServer and stderrToServer redirects stdout and stderr to eclipse console

        pydevd.settrace(
            HOST, port=5678, stdoutToServer=True, stderrToServer=True, suspend=False
        )

                  now = datetime.datetime.now()
        print(now.strftime("%d/%m/%Y %H:%M:%S ") + "Remote Debug works")
        # Here we set a break point
        pydevd.settrace()

    except NameError:
        sys.stderr.write(
            "\nError: "
            + 'Can not "import pydevd"\n\n'
            + "Use this command to install\n"
            + '"pip3 install pydev"\n\n'
        )
        sys.exit(1)


def main():
    """Main"""

    remote_debug_setup()

    print("Goodbye")


if __name__ == "__main__":
    main()
Using Eclipse is out of the scope of this how-to. There are many resources on the Internet, but I will get you started, if you never used Eclipse before. Two concepts you need to understand are prospective’s and debugging basics in Eclipse.
A prospective is a view of the workspace and depending on what you are doing the windows in that perspective can change.
For example, when in the debug perspective, windows that pertain to debugging will display.
Using the Python Debug perspective, you will be stepping your scripts. The icons below the menu will change too. You can move the windows around changing the size of them delete them, minimize, maximize them.
Try playing around with them…the good news is it is very easy to reset them back to the default. In the top menu:
To reset the current prospective back to its default:
Windows -> Prospective - > Reset Prospective
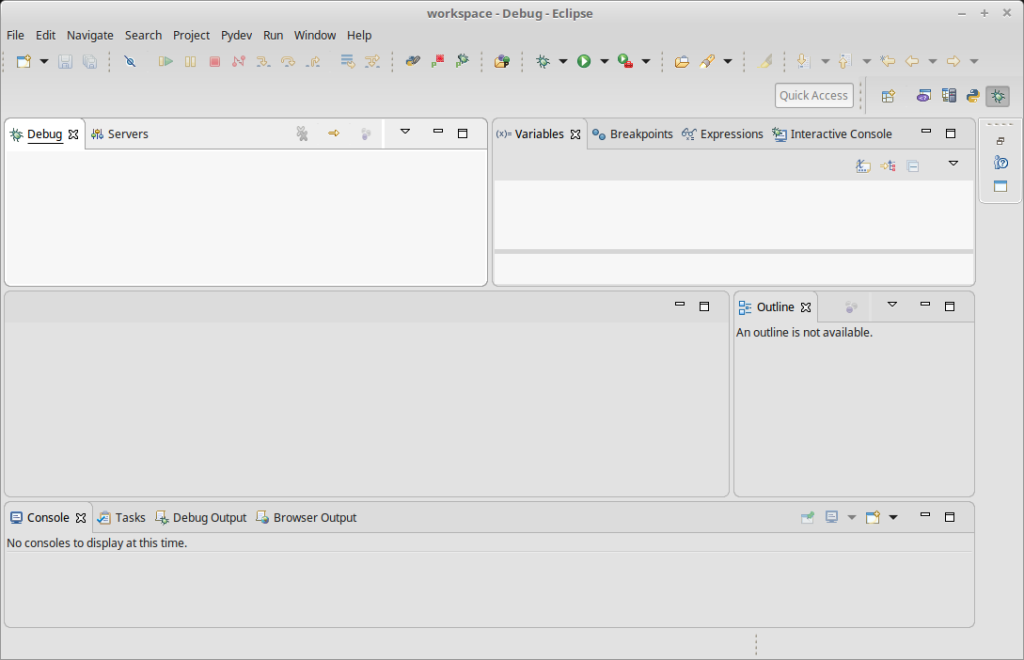
To go to a perspective you can use the icons in the upper right next to a box that says “Quick Access” no icons will display there until you go to a perspective at least once. If you know the name of the prospective you can type in in the “Quick Access” box for example “debug” will pop up as a Prospective. We will need to go to the Prospective “debug” to test our remote debugging, so type debug in the “Quick Access” box and select Prospective - Debug.
To test remote debug, copy the example script from above to the Pi. Edit line 11 variable “host” and change it to the IP of the workstation running Eclipse debug server, not the PI’s IP.
In Eclipse go to the upper menu and start the Debug Server:
To start the remote Debug server in the menu select: PyDev -> Start Debug Server
From the Pi run the script remote_debugger_test.py (what ever you named it).
$ python3 remote_debugger_test.py
Once the Eclipse debug server has connected, it should look something like this.
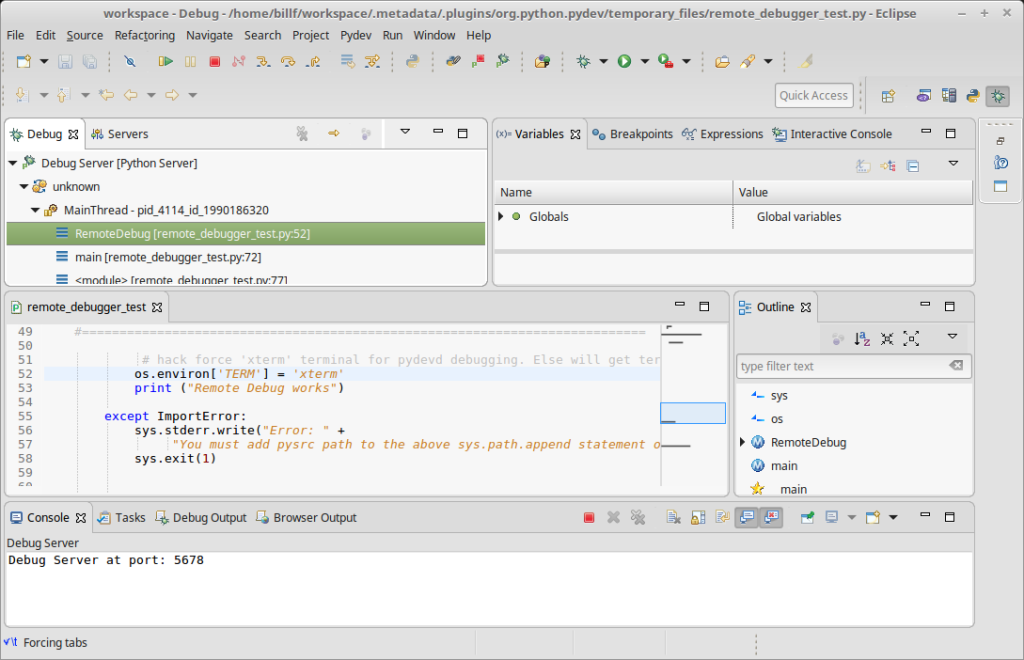
Use the icons below the menu to step through the lines of code.

Once you step through the code the debug will terminate. In the eclipse console and on the Pi you will see output and error messages print.
15/08/2021 10:24:21 Remote Debug works
Goodbye
Happy Debugging!!! Bill….