Installing Django using MySQL database
Overview
This tutorial will walk you through the steps to install Django using MySQL database.
Install and setup MariaDB (MySQL) server
Check to see if MariaDB is already installed:
$ dpkg-query -l mariadb-server
dpkg-query: no packages found matching mariadb-server
Not installed.............
If not, Install the packages:
$ sudo apt update
$ sudo apt install mariadb-server
Check to see if shows installed:
$ dpkg-query -l mariadb-server
Desired=Unknown/Install/Remove/Purge/Hold
Status=Not/Inst/Conf-files/Unpacked/halF-conf/Half-inst/trig-aWait/Trig-pend
|/ Err?=(none)/Reinst-required (Status,Err: uppercase=bad)
||/ Name           Version                    Architecture Description
+++-==============-==========================-============-=====================================================================
ii  mariadb-server 1:10.3.30-0ubuntu0.20.04.1 all          MariaDB database server (metapackage depending on the latest version)
Setup MariaDB server
To further improve the security of our MySQL installation as well as set up a password for our MySQL root user, we need to run the mysql_secure_installation script and follow the on-screen instructions.
Run the command below to configure your MariaDB MySQL server:
$ sudo mysql_secure_installation
When prompted:
Enter current password for root (enter for none): enter
Set root password? [Y/n] enter
It will prompt you for MariaDB root password enter a new password make sure to write it down you will need it later. Just hit enter for the rest of the prompt’s
You should get:
All done! If you’ve completed all of the above steps, your MariaDB installation should now be secure.
Test MariaDB server
Login from a terminal to test the installation. It will first prompt you for your user password for sudo (if not cached) next enter the root password from the mysql_secure_installation in the previous step.
$ sudo mysql -u root -p
[sudo] password for billf:
Enter password:
Welcome to the MariaDB monitor.  Commands end with ; or \g.
Your MariaDB connection id is 58
Server version: 10.3.29-MariaDB-0ubuntu0.20.04.1 Ubuntu 20.04

Copyright (c) 2000, 2018, Oracle, MariaDB Corporation Ab and others.

Type 'help;' or '\h' for help. Type '\c' to clear the current input statement.

MariaDB [(none)]>
Configure MySQL for Django
Login to MySQL server;
$ sudo mysql -u root -p
Each of your projects in Django you will want a unique database in MySQL. In this example I used mysite for the database name. For the user and password that only needs to be set once, it can be anything you like, in this case, “django” is the username. Of course you could create a new MySQL user for each project too. To create a new database and user, run the following commands in the MySQL shell replace strong-password and database name with the database and password that Django will use for this project.
$ sudo mysql -u root -p
[sudo] password for billf:
Enter password:
Welcome to the MariaDB monitor.  Commands end with ; or \g.
Your MariaDB connection id is 58
Server version: 10.3.29-MariaDB-0ubuntu0.20.04.1 Ubuntu 20.04

Copyright (c) 2000, 2018, Oracle, MariaDB Corporation Ab and others.

Type 'help;' or '\h' for help. Type '\c' to clear the current input statement.

MariaDB [(none)]> CREATE DATABASE mysite CHARACTER SET UTF8;
Query OK, 1 row affected (0.001 sec)

MariaDB [(none)]> CREATE USER django@localhost IDENTIFIED BY 'strong-password';
Query OK, 0 rows affected (0.001 sec)

MariaDB [(none)]> GRANT ALL PRIVILEGES ON mysite.* TO django@localhost;
Query OK, 0 rows affected (0.001 sec)

MariaDB [(none)]> FLUSH PRIVILEGES;
Query OK, 0 rows affected (0.001 sec)

MariaDB [(none)]> exit
To test the above setup:
$ mysql -u django -p
Enter password:
Welcome to the MariaDB monitor.  Commands end with ; or \g.
Your MariaDB connection id is 59
Server version: 10.3.29-MariaDB-0ubuntu0.20.04.1 Ubuntu 20.04

Copyright (c) 2000, 2018, Oracle, MariaDB Corporation Ab and others.

Type 'help;' or '\h' for help. Type '\c' to clear the current input statement.

MariaDB [(none)]> show databases;
+--------------------+
| Database           |
+--------------------+
| mysite             |
| information_schema |
+--------------------+
2 rows in set (0.001 sec)

MariaDB [(none)]> exit
Install and setup Django
It is recommended that Django be set up in a Python Virtual Environment for development. I use virtualenvwrapper, but you can use the common Python virtual environment venv. I will use virtualenvwrapper for my environment in this setup and the direction for setting it up can be found at Installing virtualenvwrapper Python virtual environment
Setup Python virtualenvwrapper virtual environment
$ mkvirtualenv django
Change into the environment;
$ workon django
Install Django
Install using PIP. This will install Django and the required Python module dependencies.
$ python -m pip install Django
To verify that Django is installed, type python from your terminal. Then at the Python prompt, try to import Django and print. the version:
$ python
Python 3.8.10 (default, Jun  2 2021, 10:49:15)
[GCC 9.4.0] on linux
Type "help", "copyright", "credits" or "license" for more information.
>>> import django
>>> print(django.get_version())
3.2.5
>>>
Creating a Django project
Change into the directory where you what your project code, then run the following command: Note: You’ll need to avoid naming projects after built-in Python or Django components. In particular, this means you should avoid using names like django (which will conflict with Django itself) or test (which conflicts with a built-in Python package).
$ cd ~/Devel
$ django-admin startproject mysite
Verify your Django project works
Change into the outer mysite directory, if you haven’t already, and run the following command:
$ cd ~/Devel/mysite
$ python manage.py runserver
Watching for file changes with StatReloader
Performing system checks...

System check identified no issues (0 silenced).

You have 18 unapplied migration(s). Your project may not work properly until you apply
the migrations for app(s): admin, auth, contenttypes, sessions. Run 'python manage.py migrate' to apply them.

July 27, 2021 - 07:01:23
Django version 3.2.5, using settings 'mysite.settings'
Starting development server at http://127.0.0.1:8000/
Quit the server with CONTROL-C.
Note
Ignore the warning about unapplied database migrations for now that will be fix next.
Now that the server’s running, visit http://127.0.0.1:8000 with your Web browser. You’ll see a “Congratulations!” page, with a rocket taking off. It worked!
Configure the Django settings
The settings.py file is where the project configuration for the site is kept. Open up mysite/mysite/settings.py file with your favorite editor. Change the following variables. Set to your timezone, options can be found in /usr/share/zoneinfo. I’m in mountain timezone, so I use America/Denver.
TIME_ZONE = 'America/Denver'
Replace the default SQLite database section settings with the information from the MySQL setup earlier with:
DATABASES = {
  "default": {
    "ENGINE": "django.db.backends.mysql",
    "NAME": "mysite",               #database name
    "USER": "django",               #database user
    "PASSWORD": "strong-password",  #database user password
    "HOST": "localhost",
    "PORT": "",
   }
}
Install PyMySQL Python module
Install the PyMySQL Python module it is required when using MySQL with Django.
$ pip install PyMySQL
You will also need to add the following code the mysite/mysite/__init__.py file or you will get an error when doing the next step. This will include the PyMySQL module has a regular package. When a regular package is imported, this __init__.py file is implicitly executed, and the objects it defines are bound to names in the package’s namespace. More information can be found here
import pymysql
pymysql.install_as_MySQLdb()
Initialize the database
This creates any necessary database tables according to the database settings in your mysite/settings.py
$ python manage.py migrate
If successful, this is what you should see.
$ python manage.py migrate
Operations to perform:
 Apply all migrations: admin, auth, contenttypes, sessions
Running migrations:
 Applying contenttypes.0001_initial... OK
 Applying auth.0001_initial... OK
 Applying admin.0001_initial... OK
 Applying admin.0002_logentry_remove_auto_add... OK
 Applying admin.0003_logentry_add_action_flag_choices... OK
 Applying contenttypes.0002_remove_content_type_name... OK
 Applying auth.0002_alter_permission_name_max_length... OK
 Applying auth.0003_alter_user_email_max_length... OK
 Applying auth.0004_alter_user_username_opts... OK
 Applying auth.0005_alter_user_last_login_null... OK
 Applying auth.0006_require_contenttypes_0002... OK
 Applying auth.0007_alter_validators_add_error_messages... OK
 Applying auth.0008_alter_user_username_max_length... OK
 Applying auth.0009_alter_user_last_name_max_length... OK
 Applying auth.0010_alter_group_name_max_length... OK
 Applying auth.0011_update_proxy_permissions... OK
 Applying auth.0012_alter_user_first_name_max_length... OK
 Applying sessions.0001_initial... OK
Creating an admin user
First, we’ll need to create a user who can log in to the admin site. Run the following command:
$ python manage.py createsuperuser
Enter your desired username and press enter.
Username: admin
You will then be prompted for your desired email address:
Email address: admin@example.com
The final step is to enter your password. You will be asked to enter your password twice, the second time as a
confirmation of the first.
Password: **********
Password (again): *********
Superuser created successfully.
Change into the outer mysite directory, if you haven’t already, and run the following command:
$ python manage.py runserver
Watching for file changes with StatReloader
Performing system checks...
System check identified no issues (0 silenced).
July 27, 2021 - 08:08:46
Django version 3.2.5, using settings 'mysite.settings'
Starting development server at http://127.0.0.1:8000/
Quit the server with CONTROL-C.
Now, open a Web browser and go to “/admin/” on your local domain – e.g., http://127.0.0.1:8000/admin/ You should see the admin’s login screen:
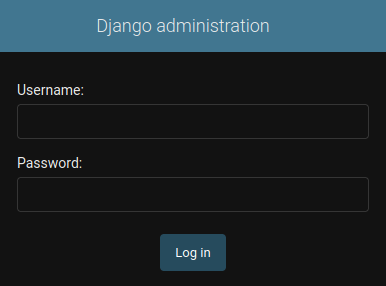
Login in and it will take you to the admin page.

Install complete!!!!!